
The post How to Clean Your Cat’s Ears: Dr. Karyn’s Tips (with Video) by Dr. Karyn Kanowski BVSc MRCVS (Veterinarian) appeared first on Catster. Copying over entire articles infringes on copyright laws. You may not be aware of it, but all of these articles were assigned, contracted and paid for, so they aren't considered public domain. However, we appreciate that you like the article and would love it if you continued sharing just the first paragraph of an article, then linking out to the rest of the piece on Catster.com.
Hi, I’m Dr. Karyn! Read my introduction to learn more about me and meet my five hilarious cats: Clutch, Cyril, Alex, Zelda, and Zazzles.
Fortunately for us, cats are pretty good at keeping themselves clean, rarely needing any major intervention from their humans, apart from some brushing and the occasional nail clip. However, some cats do suffer with waxy ears, or they may need to have their ears cleaned as part of treating an infection.
I’m lucky that only one of my cats, Clutch, needs regular aural attention. He has a couple of small polyps on the area outside his ear canals that make him a bit more prone to getting dirty ears, but fortunately don’t cause any other issues for him. He’s also a bit unusual for a cat in that he’s not quite as fastidious about his self-grooming as most other cats! Luckily, he’s quite cooperative with my efforts to keep him clean and tidy, including having his ears cleaned, and even having a bath!
So with his help, I’m going to talk you through cleaning cats’ ears, starting with why it might need to be done, and how to do it safely.
Do They Need To Be Cleaned?
For the most part, you won’t have to worry about cleaning your cat’s ears, but if you’ve noticed them looking dirty, crusty, smelly, or anything else unusual, the first thing you need to do is make an appointment with your vet.
Although, like with Clutch, some cats are just prone to waxy or dirty ears, in the majority of cases, if a cat’s ears need to be cleaned, there’s a medical reason. Ear mites, ear infections, polyps, and even certain types of cancer can result in discharge from the ears that might be creamy, crumbly, black, brown, or smelly, and different problems need different treatments. Part of that treatment may involve cleaning the ears or applying ear drops, or your cat may just need a regular cleaning regime.
The important point is that you should always seek veterinary advice before putting ANYTHING into your cat’s ears – the last thing you want to do is make anything worse.
How to Clean Your Cat’s Ears
This is something that will require at least some level of restraint, so I recommend checking out my article and video about how to safely restrain your cat. I am really lucky in that Clutch allows me to do most things to him with minimal fuss, but not all cats will be quite so compliant. It’s important to be able to see what you’re doing, so you want to make sure you’re in a place and a position that allows you to examine the ears, and if possible, have a second set of hands to help you.
Always make sure you have everything you will or might need before you get started, because even the most tolerant cat will lose patience very quickly if you have to keep stopping and starting. Your equipment list should include:
- Ear cleaning solution and/or ear drops
- Cotton pads or cotton balls – reusable ones are fine
- Cotton buds
- A towel
- Treats
→ make sure you are using ear cleaner and ear drops that your vet has prescribed or recommended
→ if you have been advised to clean the ears before applying ear drops, it’s a good idea to wait 10-15 minutes after cleaning before applying any medicated drops.
Step 1: Set a Calm Scene
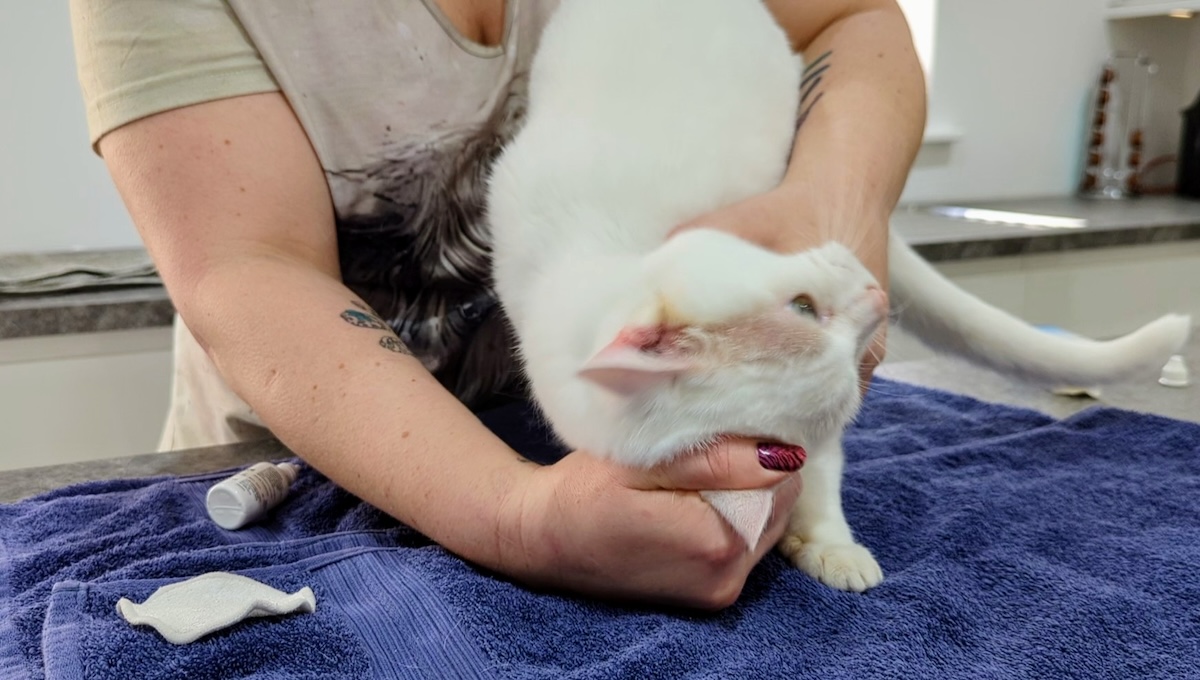
Place a towel on the table or bench you’ll be working on, or on the floor if you prefer. This provides a nice non-slip surface and can be used to wrap your cat if it becomes necessary. Bring your cat to your chosen spot and give them a treat and a fuss. Provided their ears aren’t painful, give them a bit of a rub and a scratch as a way of easing into the ear clean.
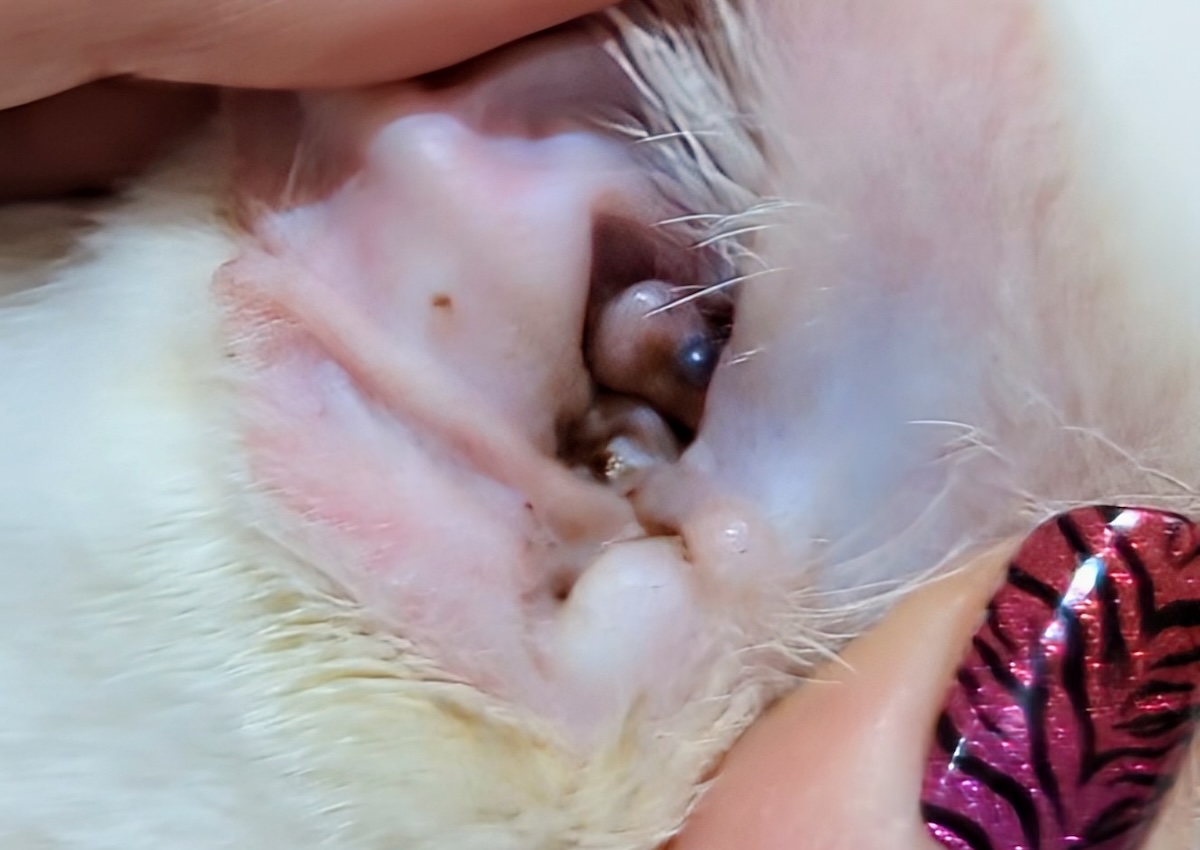
Step 2: Identify the Anatomy
Before you start poking, prodding, or cleaning, take a good look at the ear and make sure you can identify the ear canal. Your vet can help you with this, and the photo below of Cyril’s ear shows the canal very clearly.
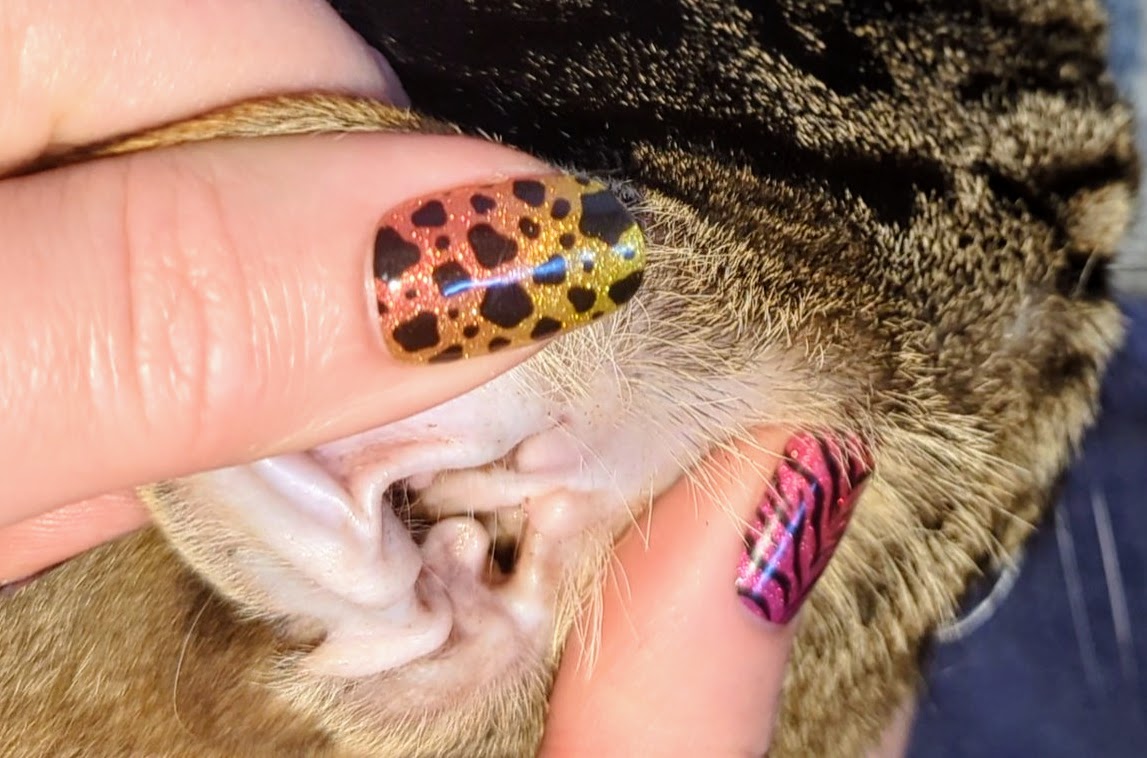
Step 3: Clean Outside the Ear Canal
This is what the cotton buds are for. Although you should NEVER put cotton buds into the ear canal, they are perfect for getting wax from out of the nooks and crannies formed by the cartilage surrounding the ear canal.
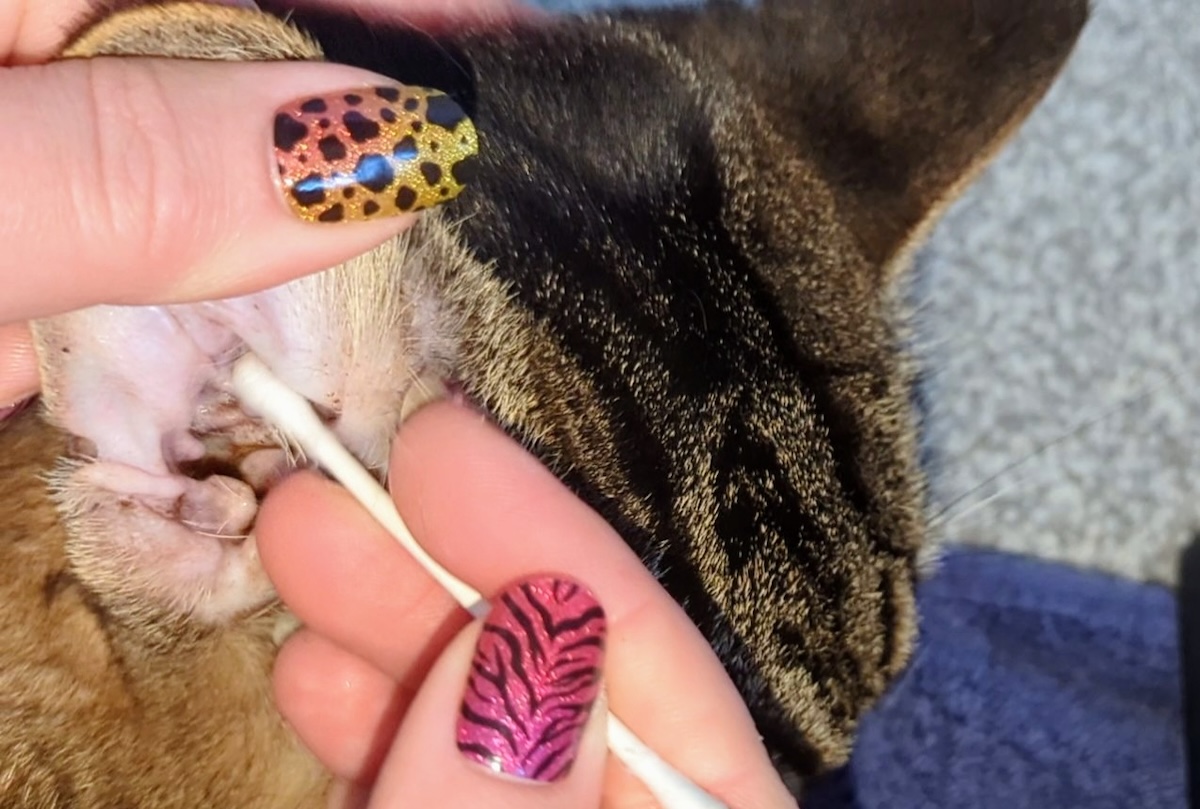
Step 4: Clean Inside the Ear Canal
If your cat is particularly sensitive or painful, or if your vet has advised you not to put any cleaning solution into the ear canal, a good option is to pour a generous amount of ear cleaner onto your cotton pad/ball, and place this over your finger to clean as much of the ear canal as you can reach.
Because of the angle of the canal, you will not be able to hit the eardrum unless you start angling cotton buds into the ear.
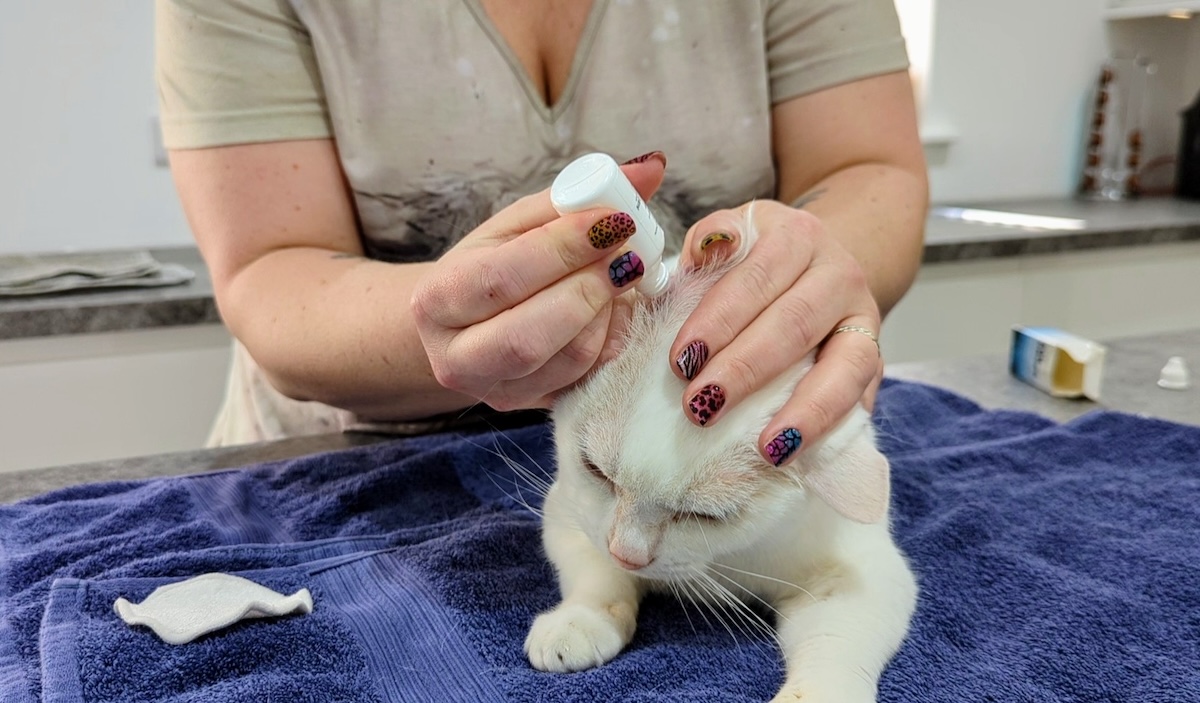
Step 5: Apply Drops or Cleaning Solution Directly Into the Ear Canal
Don’t put any solution into the ear canal unless your cat has been examined by a vet.
Hold the pinna (ear flap) against the top of the head so you can see the ear canal. Insert the nozzle into the canal to apply the solution or drops as your vet has prescribed. Keep a firm hold of your cat’s head and ear to prevent them from shaking their head, causing the drops to fly out of the ear.
Firmly massage the cartilaginous base of the ear – most cats will enjoy this step, and it helps the medication or cleaning solution reach the deep part of the ear canal. If you are using an ear cleaner, use the cotton pad/ball to wipe any discharge and solution from around the ear canal. Repeat until you are not getting any more discharge out.
Step 6: Part as Friends
Be sure to give your cat a fuss, a treat, and an extra ear rub to make sure you end on a positive note.
Your cat will likely flap their ears and shake their head for some time after their ear clean, but if this persists more than 4-6 hours, a vet check is advisable. If your cat develops a head tilt that lasts more than 4-6 hours after a clean/treatment, phone your vet.
Minimize Restraint = Minimize Stress
I find that cats are much more likely to stress and fight back when we wrap them tightly or use excessive force to hold them still. If you can make ear cleaning a positive experience, there’s a good chance that you’ll be able to clean your cat’s ears on your own, using just some firm but well-placed hands, keeping their stress levels low. However, if your cat is really not tolerating their ear hygiene, you may find that a towel wrap may be the safest way for you to proceed.
Though not all cats are as insanely relaxed as Clutch is, in many cases ear cleaning can be quite a therapeutic, beneficial, and enjoyable procedure that your cat may come to not just tolerate, but enjoy.
Join us next week when my cats and I take on medication!

The post How to Clean Your Cat’s Ears: Dr. Karyn’s Tips (with Video) by Dr. Karyn Kanowski BVSc MRCVS (Veterinarian) appeared first on Catster. Copying over entire articles infringes on copyright laws. You may not be aware of it, but all of these articles were assigned, contracted and paid for, so they aren't considered public domain. However, we appreciate that you like the article and would love it if you continued sharing just the first paragraph of an article, then linking out to the rest of the piece on Catster.com.
from Catster https://ift.tt/qEYGT4Q